

How to Build Custom Plugins in Dynamics 365 for Advanced Functionality
In the world of Microsoft Dynamics 365, one of the most powerful tools available for developers is the ability to build custom plugins. These plugins allow businesses to add advanced functionality that goes beyond the standard out-of-the-box capabilities. Whether you're looking to automate processes, enhance system performance, or implement unique business logic, custom plugins are a go-to solution.
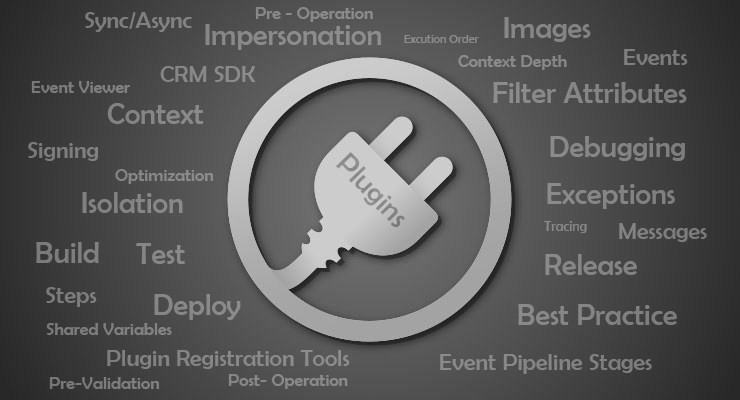
What Are Dynamics 365 Plugins?
A plugin in Dynamics 365 is a piece of custom business logic that runs in response to specific events that occur within the platform. These events are known as messages or events and can include actions like creating a new record, updating an existing record, deleting a record, or assigning a record to a different user.
Plugins are typically written in C# and are executed on the server when the specified event occurs. This allows developers to hook into the platform's operations and extend the standard behavior of the system.
When to Use Plugins in Dynamics 365?
You may want to build a custom plugin when:
⦠You need to automate complex business processes that aren’t natively supported.
⦠You want to validate or manipulate data before or after it is saved.
⦠You need to interact with external systems or services.
⦠You want to control how entities or fields behave during specific system events.
Some common use cases for plugins include automatically calculating discounts based on business rules, integrating with third-party systems, or triggering actions when a certain condition is met.
Step-by-Step Guide to Building a Custom Plugin in Dynamics 365
Let's dive into how you can create a simple plugin that executes custom business logic. In this example, we’ll create a plugin that triggers when a contact record is created and sends an automatic email to the user.
Step 1: Set Up Your Development Environment
Before you can start writing plugins, you’ll need the following tools:
⦠Visual Studio 2022 or a similar IDE.
⦠Microsoft Dynamics 365 SDK or simply use NuGet packages like Microsoft.CrmSdk.CoreAssemblies.
⦠A Dynamics 365 instance where you can register and test your plugin.
Ensure you have a Dynamics 365 environment with the necessary permissions to deploy and test plugins.
Step 2: Create a New Class Library Project
Open Visual Studio and create a new Class Library project. This will serve as the container for your plugin code.
⦠Go to File > New > Project.
⦠Choose Class Library (.NET Framework) and give it a suitable name like ContactPlugin.
Once the project is created, install the required Microsoft Dynamics 365 SDK assemblies via NuGet:
bash
Copy code
Install-Package Microsoft.CrmSdk.CoreAssemblies
Step 3: Write the Plugin Code
Now it’s time to write the actual plugin logic. In this case, we want to send an email when a contact record is created.
Create a class that implements the IPlugin interface provided by the Dynamics 365 SDK. The interface defines a single method, Execute, which is invoked whenever the plugin is triggered.
Here’s an example plugin that runs when a contact is created:
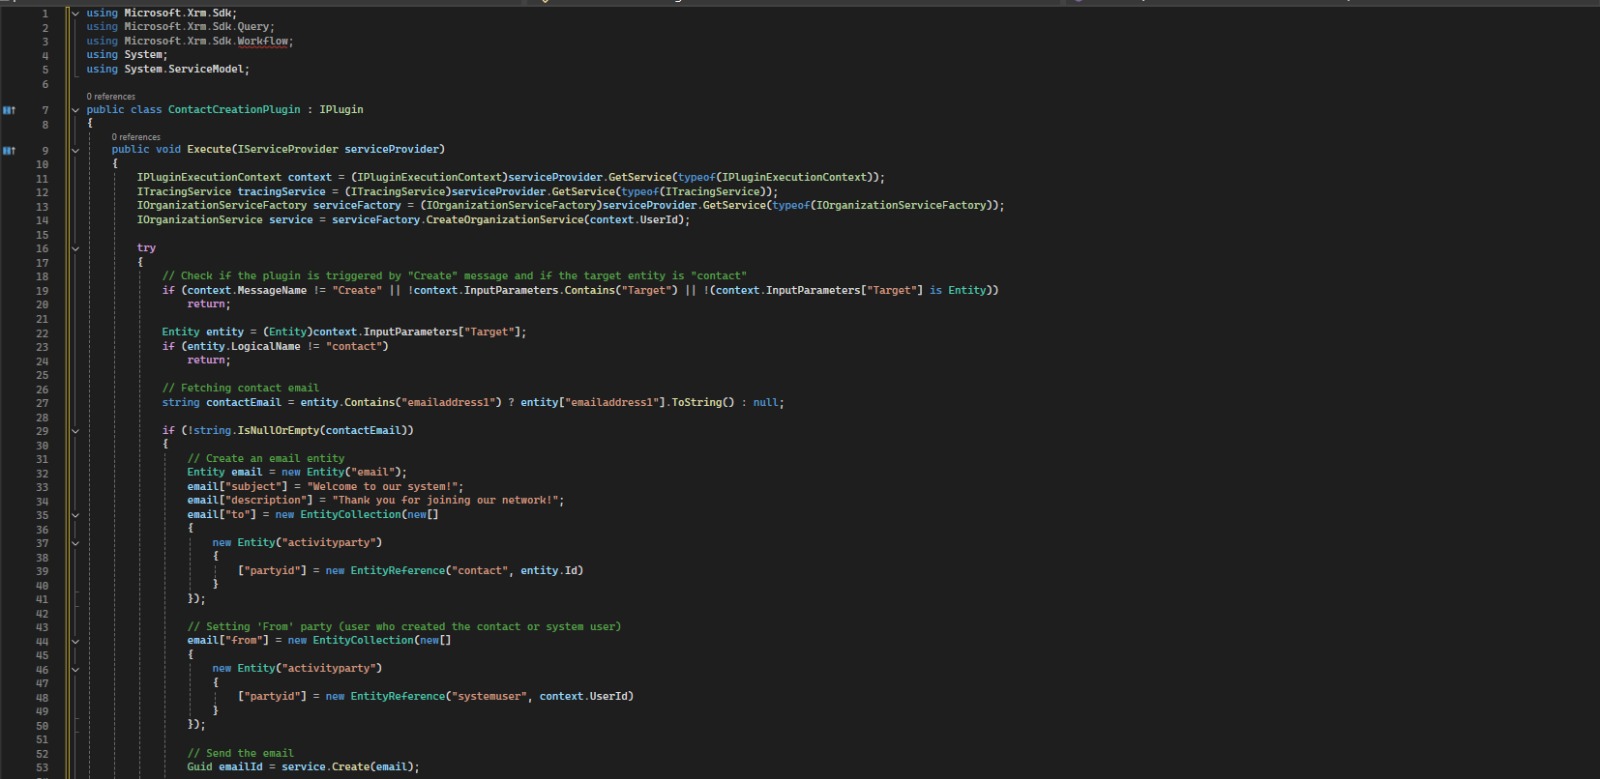
In the above code:
⦠We obtain the execution context to get information about the event that triggered the plugin.
⦠We check if the event was a "Create" event and if the target entity is a Contact.
⦠You can add logic to send an email, update fields, or perform other actions.
Explanation of Key Parts
⦠Input Parameters Check: Ensures that the plugin is triggered on a "Create" event for the "contact" entity.
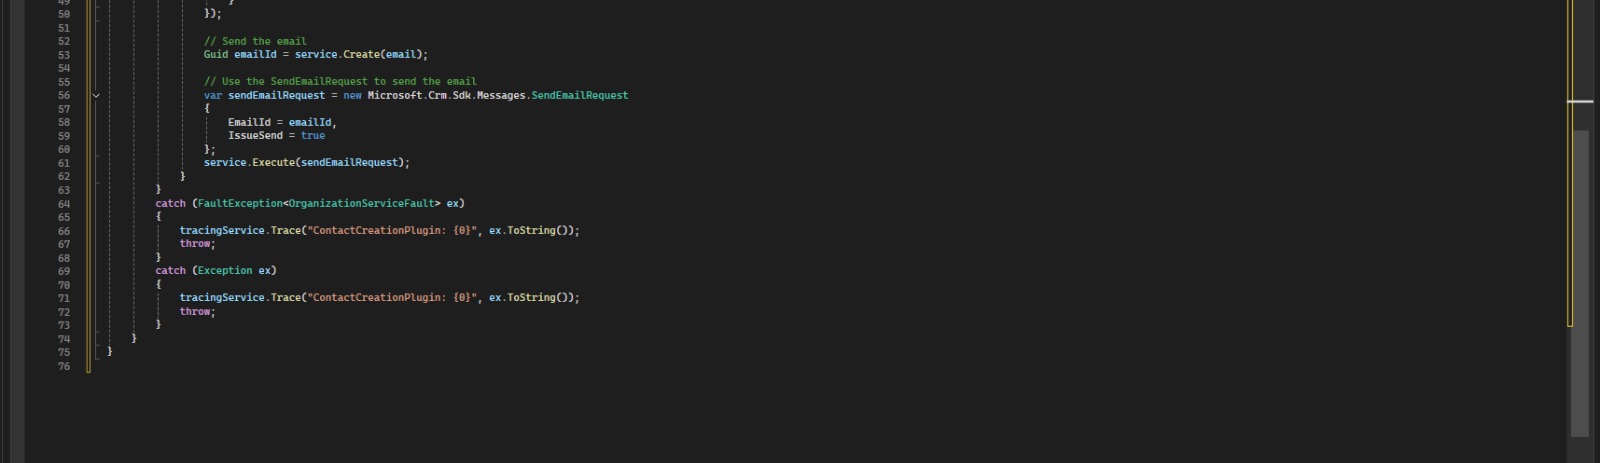
⦠Email Creation: Sets up the email entity with a subject, description, recipient, and sender.
⦠Sending the Email: Uses SendEmailRequest to send the created email automatically.
⦠Error Handling: Captures and logs any errors using the ITracingService for troubleshooting.
Additional Requirements
To register this plugin in Dynamics 365, follow these steps:
⦠Compile the plugin to generate a DLL file.
⦠Use the Plugin Registration Tool to register the DLL and create a plugin step with the "Create" message for the "Contact" entity.
Step 4: Compile and Deploy the Plugin
Once you’ve written your plugin code, compile the project to create a DLL file. The next step is to register this plugin in Dynamics 365 using the Plugin Registration Tool.
⦠Open the Plugin Registration Tool (part of the Dynamics 365 SDK).
⦠Connect to your Dynamics 365 environment.
⦠Select Register New Assembly and browse for the compiled DLL file.
⦠After registering the assembly, register the plugin step by specifying the event (e.g., "Create" for the Contact entity) and execution mode (synchronous or asynchronous).
Step 5: Testing Your Plugin
Once the plugin is registered, test it by creating a new contact in Dynamics 365. If everything is set up correctly, the plugin will trigger, and the custom logic (such as sending an email or logging a message) will execute
Best Practices for Plugin Development
When building plugins for Dynamics 365, keep the following best practices in mind:
⦠Minimize Complexity: Keep plugins as simple as possible to reduce potential errors and improve maintainability.
⦠Use Tracing: Always add tracing logic to help with debugging and understanding plugin behavior.
⦠Avoid Long-Running Processes: Plugins should be quick to execute. For long-running processes, consider using asynchronous plugins or integrating with Azure Functions.
⦠Error Handling: Implement robust error handling to prevent your plugin from causing issues in the system.
⦠Respect Platform Limits: Be mindful of Dynamics 365 platform limits such as API calls and execution timeouts.